Tuesday, May 5, 2015

Repairing That Old Fence Post


     If you have a rotten fence post you may be hesitant on what exactly replacing it might entail.  Fortunately, it’s not that complicated.  Before you get started know this, you will break a sweat and it will help to have an extra set of hands. The sooner you get to it the sooner you’ll be done and on with your Saturday activities in no time.

Some of the things you will need for this project:
  • A Sledgehammer
  • Safety Glasses
  • Concrete Mix
  • A Big Bucket
  • A New Matching Fence Post

     First you need safety glasses and a sledgehammer.  Sounds fun already, right?  You will also need a shovel and some gloves.  You want to dig a hole around one half of the post around concrete base and just as deep.  You’ll need to dig it wide enough so that you can comfortably swing a sledgehammer at the concrete block.  Once you break away about half of the concrete you and your helper should be able to pull the post out.  If the post breaks during your sledgehammer wielding, you can tie a rope around the pier to pull the rest of it out.

     Now, set your new post so that it is less likely to rot.  After you mix the concrete in a big bucket following the instructions on the bag, you want to pour your concrete so that it extends a few inches above the grass.  Taper you concrete so that rain is directed away from the post and into the ground.  If you’re worried about the aesthetics of the concrete over the function, you can always go back and paint the base green once it has set. 

     If you’re unhappy with a newly replaced post alongside your old dirty fence, use the whole weekend and make it a fence restoration project!  Power wash. Stain. Fence like new.  Be sure to pick the right pressure and  spray tip so that you don’t split the wood.  Discontinue spraying when no more color change occurs on your fence.  Power washing will roughen up the grain of the wood, but that will allow your stain and sealant to thoroughly penetrate the surface.  Use a roller to coat your fence, but then use a brush to move the stain to the corners and push the stain further into the wood, eliminating drips.


     Fence post replacement isn’t a long job, but it does take muscle, and renewing the finish of your fence isn’t a tough job, but it takes a little time and patience.  With the right team, you’ll be done by the weekend!

Thursday, April 30, 2015

We're Here for YOUR Emergency Home Repairs in Richmond, VA.


When you own a home or even just rent one, having someone to come and help you out immediately shouldn't add to the stress of going through a home emergency situation. In fact, there isn't a lot of companies that will do it without charging you an exorbitant amount of money. We get it, emergencies happen and we're here to help!

It doesn't matter if you need repairs due to: weather, water, tree or fire damage. Please call New Earth anytime 24 hours a day.  We are experienced with protecting our customers assets from further damage, estimating and working with insurance companies during the repair project process.

Some of our other emergency services include: water damage mitigation, fire and smoke damage, mold and biohazard remediation, board-up and tarping services, complete reconstruction, regional catastrophe response and mitigation services, and much more in Richmond, Virginia and surrounding areas. New Earth provides emergency services around the clock.

New Earth provides quick and efficient service for residential, commercial and industrial properties.  Rapid response helps to prevent a bad situation from getting worse. We also work with insurance companies because we know it can be overwhelming especially in time of crisis.  Please allow us the opportunity to help you navigate these waters.

New Earth VA Llc is a leader in the disaster restoration industry! With our around the clock emergency service we're ready to dispatch a crew in a moment’s notice, we are able to handle any emergency that may arise. New Earth VA has many years of experience in the disaster restoration industry and has ensured the proper repairs to countless families during the reconstruction of their homes. If the unthinkable should happen to you and yours, know that you can count on New Earth VA and our exceptional service to assist you in every step of the way, from the emergency service to reconstruction.


Tuesday, April 28, 2015

The Best Ways To Use Painter’s Tape


Giving your home a modern pop of color is one of the best ways to update your decor for the spring!  If you’re just painting accent walls or doing a more complicated color block pattern, painters tape is an essential tool in your arsenal.  Here’s a few tips on how to master the skill of perfect lines for your next painting project.

Make Sure Your Molding is Dust Free
     Using a damp rag on your molding can get rid of surface grime that will prevent your painters tape from sticking as well as it could.  It can also prevent any unwanted textures by not immortalizing dust in your paint job!  If you’re doing a project in your kitchen, using a mild detergent will help dissolve any grease that has popped from your stove onto the walls over time.  Wait for your newly cleaned surfaces to dry before applying the tape.

Use a Handy Tape Applicator
     You know the frustration you experience when trying to pull out a piece of cellophane to cover leftovers and it sticks to itself?  Using long, continuous pieces of tape can have that same effect!  However, you really do want to use long pieces of tape so that your straight line of paint has as much continuity as possible.  How to achieve that without the frustration in a fast and simple way is using a tape applicator.  It’s designed for precision by using the adjacent surface as a guide and has a built in tape cutter.  They’re available at most home centers along with the roll of tape. 

Seal the Tape
     Prevent any paint from seeping under the tape by using a flexible putty knife to press down on the edge.  Start from one end and apply downward pressure along the length of your tape line, tilting your tool slightly towards the edge directly next to the surface you’re painting.  This step ensures crisp, clean lines.

Protect Your Other Walls
     This is especially important if you’re painting the ceiling or having younger ones help with the paint project. Using lightweight plastic to cover your walls while painting the ceiling will help prevent roller splatter from inadvertently making it onto other surfaces.  The trick to hanging it is using a wider tape.  Press the top part of the tape as explained above and leave the bottom half un-stuck.  Hang your lightweight plastic by pressing it against the curled up edge of your tape.  Overlap your plastic sheets at doorways for openings.

Cut the Corners
     The trick to getting corners just right is by running the first piece of tape up the wall.  Use your edge flattening tool to press the tape firmly into the corner, then use a utility knife to remove the excess on the wall. That way, the next piece of tape you apply doesn’t have to so perfect.  This same trick can be used when taping off window glass to paint the trimming.

Protect Your Floors
     Whether you have carpet or wood flooring, you don’t want drops of paint on either!  While using drop cloths helps deal with that, they can move on you while working your way through an area.  Use masking paper along with your painters tape at the baseboards and it will give you the freedom to move your drop cloths from one side of the room to the other without worrying that they remain perfectly against the wall.  You can protect door molding from roller splatter using masking paper as well.

Make sure your using the proper tools when considering your next paint project.  Remember, not all painters tape is equal and using the right one for the job is important to get the results you want.  While it’s best to remove painters tape while the paint is still wet, most water based paints dry quickly, or you may not have time to apply a second coat in one day.  Tearing away your painters tape on a semi-dry wall can potentially pull the paint away with the tape.  So, if you can’t pull off the tape right away, wait until your wall is fully dry and use a putty knife to break the seal between the paint and the tape.  Always pull the tape away at a 45 degree angle to the wall.


Thursday, April 23, 2015

Beginner To Advanced Tips From The Carpentry Pros


There are lots of small home repairs that you want to be able to do yourself without hiring a contractor.  For all those weekend projects, we’ve outlined a few carpentry tips that only experience can bring. The more you practice, the better you will perfect your home DIY skills.  

     Beginner
1.    Make sure you write your measurements down.  I know a lot of people are saying “duh!”  But those are the same people who say “Duh, I can remember 5 and 3/8 inches” and accidentally cut 3 and 5/8 inches.”  It’s the simplest thing you can do to ensure your success.  Measure twice and write it down!  Throw some masking tape on your measuring tool to make it that much easier to jot down.
2.     Use a pencil whenever you can instead of your measuring tape.  Not only can it be faster, but making a mark on the lumber you’re planning on cutting can be the most precise.
3.     Having the best all around hammer can make your life easier.  Lots of people have different opinions on this, but a smooth-faced, 20 ouncer with a straight claw can do most any job.  The straight claw is a much better shape for removing nails.

     Intermediate
1.     If you’re doing projects like adding interior trim, an air powered trim gun can give your project faster and more accurate results.  You won’t be burdened by hitting the nail precisely every time while not knocking your trim out of place.  Plus it only gives you tiny little holes to fill in!
2.     When you’re building a deck, use the construction lumber as a template!  You don’t need an elaborate strings and stakes set up to guide you.  Use the construction lumber to outline the structure by roughly tacking it together, move it aside to dig the posts and put it back to set the posts.  Easy.
3.     Use what you already have lying around to make a miter saw bench for your project.  Not only does it double as a super convenient work surface, but you won’t have to kneel or hunch to make your cuts.  Often times means more accurate and easier cuts.

     Advanced
1.     No matter how advanced you are, getting the perfect miter cut can be tricky.  Use a test piece first!  Use smaller pieces to achieve the perfect miter angle, then cut the real thing.
2.     Estimate framing materials for walls using this formula: One stud for each foot of wall.  Five feet of plate material (bottoms, tops and ties) for each foot of wall.  Yes, it’s going to seem like a lot, but you’ll need it for windows, door frames, blocking and braces.  
3. Position your lumber using the toenail trick.  To adjust stubborn boards, drive a nail at an angle through the edge of a stud to coax it into place.
 

No matter what your skill level, remember that when it comes to carpentry for your home, practice makes perfect.  Of course you might make a few mistakes, but learning from them is crucial.  Hopefully some of these tips will help you with your next project!

Monday, April 13, 2015

#DIY Decor - Wall Mounted Coat Rack


     “Life hacks” are growing to immense popularity with tips and tricks on how to achieve kitchen and home bliss with half of the effort and usually, half the cost.  While Spring is the time of year you start thinking about home improvement projects, a grand undertaking might not always be in your budget.  Adding simple DIY decor around your home is a great way to bring a fresh, updated look without having to worry about breaking the bank.  Current trends include a mix of rustic with the modern, which means we’re seeing a lot of wood details combined with industrial style hardware. Add a few bright colors with perhaps some geometric designs to the mix and you’ve got something sleek and modern.  This is the perfect formula for a Do it Yourself venture.  Spend a weekend perusing your local thrift and hardware stores and you can find lots of treasures to incorporate these design elements in your home.

     One project we had a lot of fun on was putting together this rustic multi-purpose hanger.  Built with a solid piece of 100 year old Oak and adorning cast iron pegs as the hangers makes this a classic luxurious addition to an entryway or wet room.  While we have the access to this gorgeous material, it is just as easy to recreate at home using a few techniques.  Decide on the width and length you want your hanger to be for the space where you’re going to hang it.  Buying a piece of lumber at your local hardware store is cheap and they’ll cut it to the dimensions you want.  Use different sized sandpaper to experiment with the worn-in look you’re going for and stain it to match the rest of the room.  You may want to go over the dry stain with sandpaper again for an extra rustic feel.  You can find different sizes and shapes and colors of hangers that you like from a thrift store for an eclectic, whimsical look, or you can purchase matching hardware from your home store.  For an even homier feel, lots of times antique stores will have matching sets of beautiful hardware for an extra penny.

It’s a simple design, with lots of visual and functional payoff!  

Thursday, April 9, 2015

The Art of Building #Custom


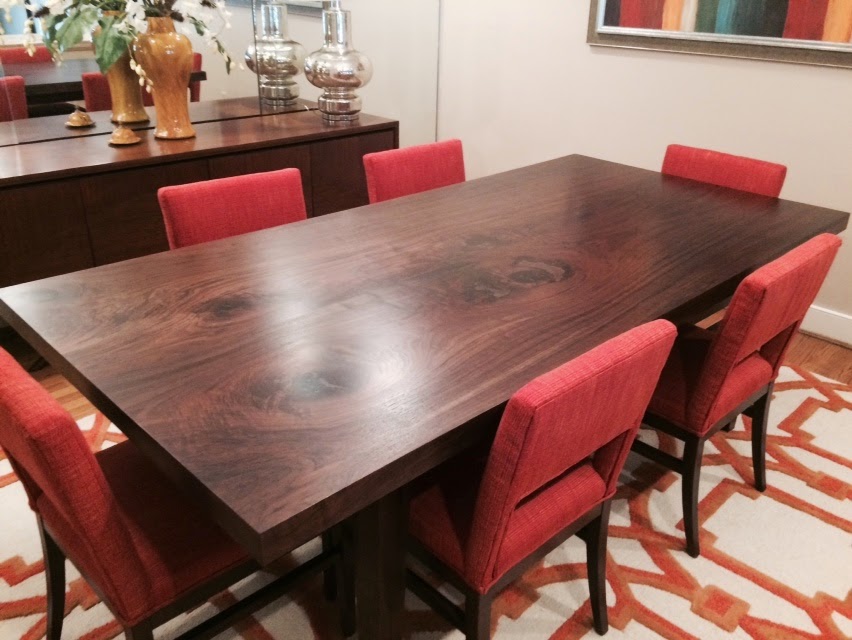
Our favorite projects at New Earth include those that let us work with our hands. There is a very special connection between a person and a piece of wood, there is something very exceptional about working with something grown in nature. We like the idea of taking something like a fallen tree and repurposing it to make a beautiful dining table. Most of these pieces have to be custom ordered, not just because we like to build things to your own specifications but because we believe that has started to become a lost art. Here we share the process from beginning to end, on what it is like to build a dining room table.


Monday, April 6, 2015

Outdoor Living Done Right


     This time of year people start thinking about outdoor space.  You want to find more reasons to be outside than inside and who can blame you, Virginia is beautiful in the spring.  Building a space to live and entertain in the outdoors can range from installing a simple patio, to building a deck, to building a Florida Room addition.  Any one of these projects adds value to your home and can recoup the cost when you decide to sell.  Whether you’re keeping it simple or going big, here are the best elements of outdoor living that will make sure you get the most out of your outdoor space.

Location
  •   Now’s a good time to locate the sun in relation to your property.  Where will the sun be in the morning/afternoon/evening?  You want sun in your sunroom, so maybe the shady side of the house isn’t the best location.  The most ideal spot has sun exposure with some shade perhaps provided by a tree.
Multiple Uses
  •   You want your space to accommodate lots of different occasions.  Being able to fit a dining table as well as a seating arrangement can assure you get the most for your investment.  Not only can you enjoy meals or lounge in the cool breeze, it can double as a home office for mornings when you’d like to take your coffee al fresco.  
Decor
  •   Just because your room can be exposed to the elements, doesn’t mean your furniture needs to be plastic.  Upholstered seating, along with pillows, throws and a durable rug truly make the space double as a second living room.  Complete the effect with side tables and lamps, just make sure to include outlets into your design plans.  If you’re worried about sun damage to your furniture, adding privacy curtains can protect your fabric as well as prevent overheating.
    

     Making an addition to your living space can be such an exciting project as well as a sound investment.  As a transitional space between indoors and outdoors, pile it up with lots of potted plants and whimsy.  Have fun with it!  After all, it is supposed to be a space to relax, enjoy the scenery and entertain family and friends.